Michelin AIR 026-528-0 Main
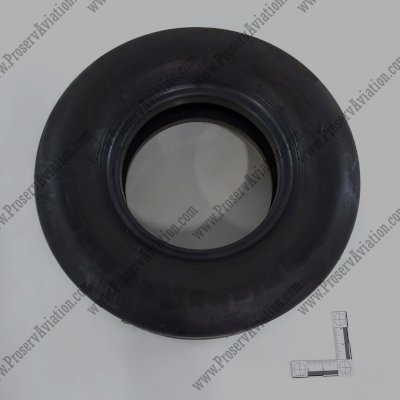
Michelin AIR 026-528-0 22×7.75-10 12 Ply 190 mph TL (Tubeless) Main Landing Gear
Specifications
| Brand | Michelin Air |
|---|---|
| Part Number | 026-528-0 |
| Size | 22 x 7.75-10 |
| Ply Rating | 12 PR |
| Speed Rating | 190 mph |
| Type | TL ( Tubeless) |
| Typical Position | Main Landing Gear (MLG) |
| Typical Aircraft | Cessna Citation CJ (525) Cessna Citation CJ1 / CJ1+ Cessna Citation CJ2 / CJ2+ Cessna Citation M2 (525) |
| Construction | Bias Ply |
Michelin Air Features
Just the right balance of performance and durability. Michelin Air tires are designed to provide:
- A very long tire life and lower maintenance costs due to fewer tire changes.
- Exceptional balance for smooth taxiing, even wear, and heat resistance.
- Maximum protection against sidewall cracking caused by ozone and UV light.
- Excellent lateral stability and impact absorption, even under rough landing conditions.
- Michelin AIR features ozone/UV-optimized sidewall compounds and MX2000 tread compound for durability.
Aircraft Tire Changing Tips
1. Preparation & Safety
- Verify maintenance manual: Always follow the Aircraft Maintenance Manual (AMM) or Component Maintenance Manual (CMM) for the specific wheel and tire assembly.
- Check tools: Torque wrenches, tire inflation cage (or approved device), nitrogen supply (never plain compressed air), bead lubricant, protective equipment.
- Inspect new tire: Confirm correct part number, ply rating, speed rating, and approval for the aircraft.
2. Removing the Old Tire
- Deflate the old tire completely.
- Remove wheel from the aircraft per AMM instructions (jack aircraft, secure with stands).
- Split the wheel halves (most aircraft wheels are two-piece bolted assemblies).
- Separate the old tire from the wheel halves.
- Inspect the wheel halves for cracks, corrosion, or wear—refer to service limits.
3. Preparing the New Tire
- If tubeless: Ensure bead seat area is clean and lubricated.
- If tube-type: Insert a new tube (never reuse old tubes) and slightly inflate to remove wrinkles.
- Use only approved lubricants (like tire bead soap or mounting compound).
4. Mounting the Tire on the Wheel
- Position the tire on the lower wheel half.
- Install tube (if required), ensuring proper alignment of valve stem.
- Place the upper wheel half and assemble bolts.
- Torque bolts in a crisscross/star pattern to manufacturer’s specification.
- Recheck torque after a short settling period (per manual).
5. Inflation & Seating
- Inflate inside an approved tire inflation safety cage.
- Use dry nitrogen for inflation to reduce moisture and expansion risks.
- Inflate in steps: partially inflate, deflate, and re-inflate to help seat the beads and tube properly.
- Inflate to service pressure per aircraft manual.
- Inspect for bead seating, tube pinching (if tube-type), or bulges.
6. Reinstallation
- Reinstall the wheel assembly on the aircraft per AMM.
- Torque axle nut or bolts as specified.
- Safety wire or cotter-pin as required.
- Service with final nitrogen inflation and verify pressures match operating requirements.
7. Final Checks
- Leak check with soap solution.
- Ensure valve core and cap are tight.
- Record maintenance action in logbooks per regulatory requirements.
⚠️ Important Notes:
- Aircraft tire installation must be done by, or under the supervision of, a licensed aircraft mechanic.
- Never exceed inflation limits; over-pressurization can cause explosions.
Always consult the specific AMM for your aircraft type.