Michelin AIR 038-675-2 24×7.7
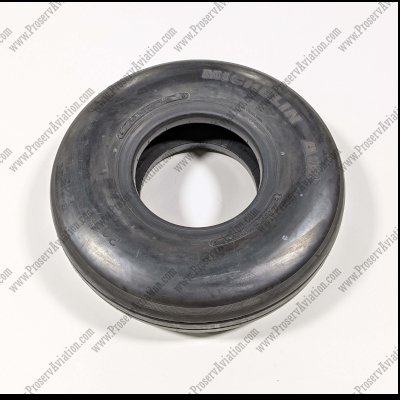

The Michelin Air 035-675-2 is a 24 x 7.7 inch aviation tire with a Ply rating of 14, Speed rating of 210 MPH, tubeless main aircraft tire compatible with the Hawker Beechjet 400A and Mitsubishi MU-300 aircraft.
| Brand | Michelin Air |
| Part Number | 038-675-2 |
| Size | 24 x 7.7 |
| Ply Rating | 14 |
| Speed Rating | 210 MPH |
| Type | TL (Tubeless) |
| Typical Position | Main Landing Gear (MLG) |
| Typical Aircraft Application | Hawker Beechjet 400A Mitsubishi MU-300 |
| Construction | Bias Ply |
Michelin Air
The Tire For Demanding Pilots
Just the right balance of performance and durability. Michelin Air tires are designed to provide:
- A very long tire life and lower maintenance costs due to fewer tire changes.
- Exceptional balance for smooth taxiing, even wear, and heat resistance.
- With maximum protection against sidewall cracking caused by ozone and UV light.
- Excellent lateral stability and impact absorption, even under rough landing conditions.
Installing aircraft tires
Installing aircraft tires is more specialized than installing car or truck tires, because it must follow aviation maintenance procedures (typically under FAA/EASA rules) and often requires licensed mechanics (A&P). Here’s a high-level overview of the process:
1. Preparation & Safety
- Verify maintenance manual: Always follow the Aircraft Maintenance Manual (AMM) or Component Maintenance Manual (CMM) for the specific wheel and tire assembly.
- Check tools: Torque wrenches, tire inflation cage (or approved device), nitrogen supply (never plain compressed air), bead lubricant, protective equipment.
- Inspect new tire: Confirm correct part number, ply rating, speed rating, and approval for the aircraft.
2. Removing the Old Tire
- Deflate the old tire completely.
- Remove wheel from the aircraft per AMM instructions (jack aircraft, secure with stands).
- Split the wheel halves (most aircraft wheels are two-piece bolted assemblies).
- Separate the old tire from the wheel halves.
- Inspect the wheel halves for cracks, corrosion, or wear—refer to service limits.
3. Preparing the New Tire
- If tubeless: Ensure bead seat area is clean and lubricated.
- If tube-type: Insert a new tube (never reuse old tubes) and slightly inflate to remove wrinkles.
- Use only approved lubricants (like tire bead soap or mounting compound).
4. Mounting the Tire on the Wheel
- Position the tire on the lower wheel half.
- Install tube (if required), ensuring proper alignment of valve stem.
- Place the upper wheel half and assemble bolts.
- Torque bolts in a crisscross/star pattern to manufacturer’s specification.
- Recheck torque after a short settling period (per manual).
5. Inflation & Seating
- Inflate inside an approved tire inflation safety cage.
- Use dry nitrogen for inflation to reduce moisture and expansion risks.
- Inflate in steps: partially inflate, deflate, and re-inflate to help seat the beads and tube properly.
- Inflate to service pressure per aircraft manual.
- Inspect for bead seating, tube pinching (if tube-type), or bulges.
6. Reinstallation
- Reinstall the wheel assembly on the aircraft per AMM.
- Torque axle nut or bolts as specified.
- Safety wire or cotter-pin as required.
- Service with final nitrogen inflation and verify pressures match operating requirements.
7. Final Checks
- Leak check with soap solution.
- Ensure valve core and cap are tight.
- Record maintenance action in logbooks per regulatory requirements.
⚠️ Important Notes:
- Aircraft tire installation must be done by, or under the supervision of, a licensed aircraft mechanic.
- Never exceed inflation limits; over-pressurization can cause explosions.
Always consult the specific AMM for your aircraft type.